GAS – Ability Cooldowns and Ability UI Widgets
Creating UI Icons to Showcase Owned Abilities + Cooldowns
I wanted to create a system where I could select the specific AI NPCs to see what their active abilities are, and watch the cooldowns for each ability. If you've ever played a MMO like World of Warcraft, you know the gameplay is basically ability whack-a-mole, where you press the best ability as soon as it's available to maximise your damage. In early stages of this project, I just want to automate the process of attacking targets and watching how it unfolds - from here, I should be able to continuously add additional abilities, logic behind the AI behaviour, and UI interaction to build the gameplay.
This post aims to explain how the UI cooldown feature was developed and why it was such a pain in the arse to get working...
The Easy - Selecting the Units
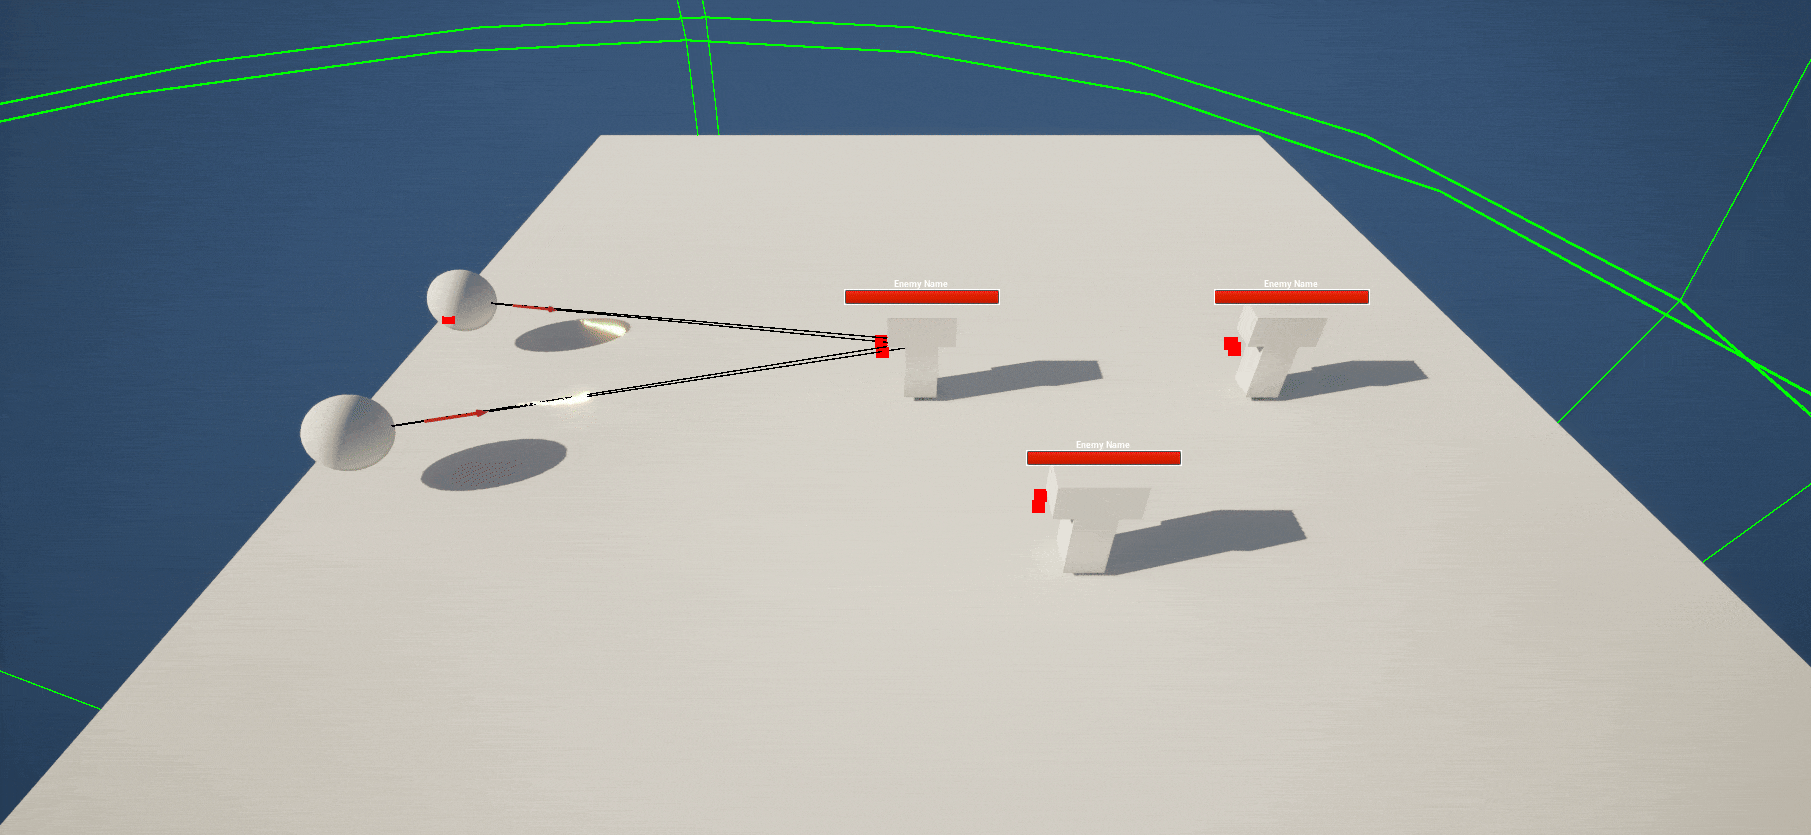
Up until this point, I hadn't set up any proper game modes, controllers or characters - so this was promptly set up. We ensured that the cursor was visible on BeginPlay and that we can move the camera around with WASD (this still needs to be developed properly). The ability to move the camera around and use the mouse means we could establish selection functionality - for now, we're just focusing on clicking individual units to see their abilities. The blueprint for this functionality is below:

The selection is handled through a simple mouse click input action which has been enabled on the controller class default 'Show Mouse Cursor' checkbox.
- The 'Get Hit Result Under Cursor by Channel' node effectively does a line trace under the cursor when you click.
- We check to see if this has been selected before, if yes we do nothing, if not, we save the selected character.
- The selection and deselection is handled inside of the character itself by toggling visibility on a decal.
- We then create the UI widget on select and initialise the values.
The majority of the work happens within the HUD UI and the individual icons.
Changes to Parent AI Blueprint
Rather than manually going through and assigning abilities in the blueprint, the Parent AI has been changed so a user exposed array determines both the sequence of the abilities and what abilities the AI has. While this isn't complicated, it allows me to always use the array index as a priority system, and simplifies how the abilities are added to the gameplay ability system and connected to the different 'use ability' custom events.

Establishing Data Tables and Structs
To help with organising the abilities and generating the ability icons, I thought it might be better to build a struct with the ability information, and then populate a data table with all of the abilities the NPC AI could access. This would allow easier creation of different abilities, including icons and visual properties. Now, I'm pretty new to using both custom structs and data tables, so I've probably done this in the dumbest ways, however it is what it is...
The ability struct has the following information:
- Ability Name (for potential hover over UI effects - not currently used)
- Ability Image which is passed through to the icon to visualise the ability
- GAS Ability - A reference to the specific Gameplay Ability class
- Cooldown - A reference to the specific Gameplay Effect cooldown class attached to the ability
I found when building the UI components, it was important to utilise the gameplay class elements to compare against arrays of active abilities and cooldowns to get the right information. This might be poor practice, I don't know, but it works, so I won't question it... I'll likely add a lot more properties to these structs as the abilities develop - probably a good idea to establish common struct elements for these abilities moving forward.
Main HUD Setup
The main HUD consists (at this point in time at least) of just a horizontal box, which is centered and anchored on the bottom middle of the screen. This box will hold all the abilities each selected AI pawn has. The first thing we do when we select the AI pawn is we populate a row of the abilities the pawn can use. Now, when these abilities have been provided to the character, they return as 'Gameplay Ability Spec Handle Structures' - which are essentially references to those instances of abilities. The problem is, my understanding of what's in this structure is limited, and it can't be broken like other structures in Unreal Engine. It's actually really frustrating to deal with, and the more documentation I read about the GAS system, the more it's evident that the inner workings of each abilities are really intended to be accessed within C++... I'm not a C++ coder for Unreal, so it's somewhat frustrating. So I've done what I can to make use of the blueprint within my means.
Anyway, we get all the abilities the AI pawn has and we stash them into an array of Gameplay Spec Handles - why do we do this? So we can match these abilities to the data table/ability struct we built to retrieve the visual icons. The whole idea of this is we have one icon UI component that can populate any abilities visual and cooldown/track the ability... In theory anyway. This initialisation process looks like this:

From that, we create an ability icon, which is a standalone UMG widget for each ability. To do this, we get the data table of all available abilities, we loop for each row and break the struct. We compare the gameplay ability class from the struct to the specific gameplay ability from the spec handle itself - for some reason, with the spec handle struct we can't get the ability class from it, but we can get the specific ability and then get it's class. By comparing the ability spec handle to the ability in the data table, we can create an Icon UI widget and 'feed' through the brush (aka image) and the reference to the cooldown (as well as the AI pawn who's been selected). We use this information to track the cooldown of the ability itself, much the same way with how we track the ability class from the spec handle. Blueprint is as below:

Let's have a look at how each of the icons are set up to populate the visuals, the material (handling the cooldown animated shadow rotation) and tracks the remaining time for the cooldown to be available again.
Ability Icon Setup
The ability Icon is somewhat straight forward in it's setup, but a little more complicated when it's leveraging the cooldown information from the gameplay abilities and gameplay effects. The original setup initialises the image from the data table reference fed through to the creation (from main HUD), and creates a dynamic material instance for the circle reveal on cooldown. We also have a custom event to reset/initialise the values of the cooldown material, and the cooldown number counter. The blueprint for the creation of the icon/initialising it:

Just for reference, the UI material that we have created to visualise the cooldown looks like this:

Let's have a look at how each of the icons are set up to populate the visuals, the material (handling the cooldown animated shadow rotation) and tracks the remaining time for the cooldown to be available again. We place this on tick as we need the cooldown to be constantly tracked - it's basically binding the values. There may be a better, more optimal way to handle this, so if I find it, I'll fix it!
Getting the specific cooldown information is actually a pain. There is a node in the GAS system which you can access from a reference to the specific gameplay ability called 'Get cooldown time remaining' but for some stupid reason, this always returns 0 - perhaps I've set something up wrong, but I couldn't get this to work. So to get this to work, I did the following:
- We do a query on the Gameplay Effect based on the Gameplay Effect class fed through to the UMG widget from the data table struct we had. This SHOULD return the specific gameplay effect we are looking for, however it returns ALL gameplay effects present on the AI pawn.
- Because of this, we will have multiple gameplay effects in this array - this could be active cooldowns, it could be debuffs from the boss. From that, we effectively do a comparison between the one we are looking for, and what was returned from the query.
- From that, we now have access to the specific Gameplay Effect handle we are looking for - in that, we can retrieve information on the total duration of this Gameplay Effect CD, as well as the remaining duration.
- From that, we use the remaining duration as an int to update the UI text on the icon.
- We also derive a 0-1 float range to represent the percent of the UI material (how much the UI material is rotated).
- We update the visuals based on this information, but check if the value is 0 and then reset the UI.
- I noticed the comparison of <=0 worked sometimes, but not others, so I put a little bit of a buffer in there of 0.02.
This effectively tracks the specific cooldown of the specific ability the icon represents. Because this works in a relatively modular fashion, each icon tracks independent cooldowns on tick so we can see the status of each cooldown as they are used and available to be used.
It looks like this:

The final UI elements and UI icons look like this. While the very large gif doesn't really demonstrate the specific spells (the fireball spell icon is a frost bolt for example), it showcases the overall effect of the UI elements being updated.
Final Comments and Notes
The icons are quite simple in their creation, however this approach tries to let the data table dictate exactly how the icons look and what abilities are attached to them. In essence, hopefully we can rapidly build abilities now rather than manually coding in each ability for each enemy type. The hope is that we can control the array of abilities through a drag and drop card based system to 'craft' our battle team and abilities depending on the boss encounter, gear and upgrades. This is the long term plan but I can see how the changes to how the UI works and how the main character works would help facilitate the AI Development and abilities of each NPC AI.
The main takeaways from this are:
- I still have minimal clue (very little) about how the Gameplay Ability Spec Handle works, as well as the Gameplay Effect Spec handle...
- Modular UI works pretty well for this project
- Overall, I'm understanding more about both the state tree, as well as the overall Gameplay Ability system (minus C++ components)
There's still a lot to add and do but if we keep making progressive improvements, we'll eventually end up with a game (or something that resembles a simulator...).